Bitsboard Superusers
The superuser account was created for parents, teachers, and professionals that have multiple students using Bitsboard. As a superuser, managing and updating the accounts of multiple users can all be simplified and greatly streamlined.
Here is how it basically works.
First, you create the main superuser account
Second, you create a unique account for each student (this could be your kids, clients, or students)
You can create student accounts with or without an email and password.
Student accounts without an email and password, can only be accessed on a device that the superuser logged into
Student accounts with an email and password, can log into Bitsboard on their own on any device
The real magic of superusers happens when you turn “Cloud Sync” on for both the superuser and for the students. With “Cloud Sync” turned on, all boards, students, and their settings will automatically be synced across devices.
Example 1:
Say you are a parent with two kids. If you create a superuser account for yourself as the parent and link both of your kids to the superuser account, then you can maintain and update all of the content on your device and all of those changes will automatically be reflected on your kids devices.
Example 2:
Say you are a teacher teaching two different classes with 8 students each. In this case, you can link each student to your superuser account and also create a Class for each of your classes in Bitsboard. Once you have each student join each class, all of the content will automatically be updated and synced for all of your students. Anytime you make a change to any of your boards, the changes will instantly appear on all of your student devices.
Each time students perform an activity, they will also be able to instantly email the scorecard to the superuser (this will be added in the next few weeks)
Still confused? Please feel free to send us an email at support at happymooseapps.com if the above examples are not clear so that we can further improve the description of what a superuser can do for you.
How do you create a superuser?
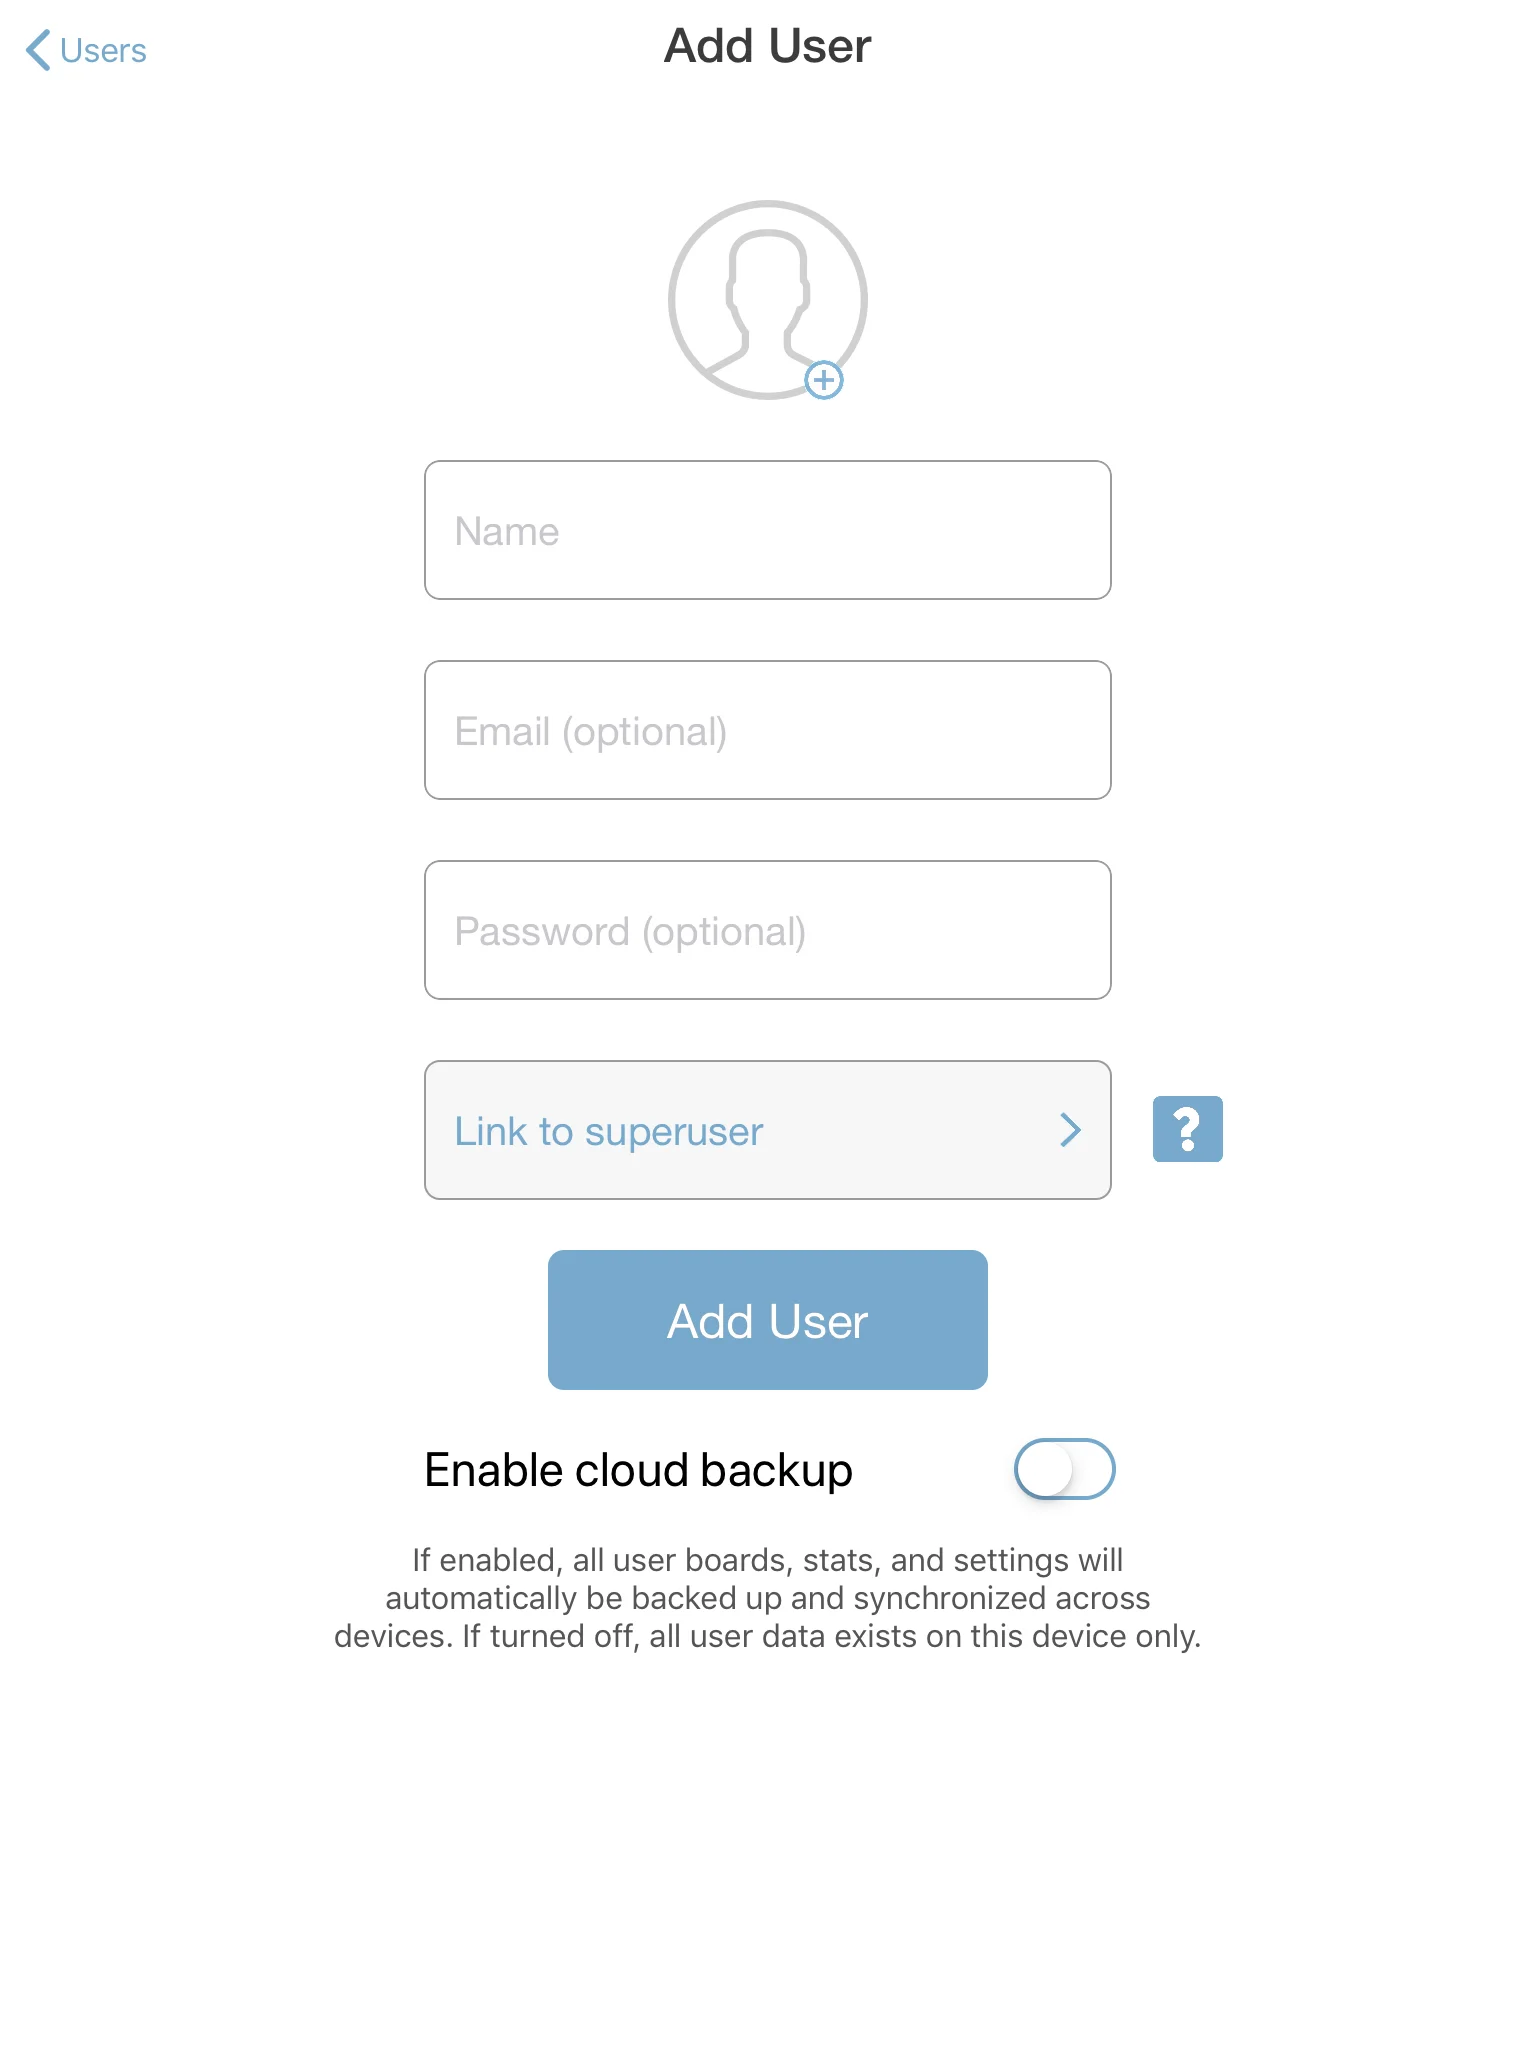
Simple. Any registered user (i.e. a user with an email and password) can be a superuser. To become a superuser, just go and have the other user accounts link to your (superuser) account. How? If you are creating a new user on your device, not the “Link to Superuser” field and select the main (teacher or parent account) you want to link to. If you have previously created the account for your child or student, just go to Settings > Account and then press on “Edit User”. Now update the user by linking him or her to the desired superuser account.
Bitsboard Users
Bitsboard allows you to add as many users as you like. This way you can create a custom learning environment for every user. This is really important so that you don't have to keep tweaking all of the individual game settings and preferences. They are always stored at the user level.
For example, if Felix is just getting started, you can limit the Photo Touch game to show a max. of 4 images. For Sonja, who is much more experienced, however, you could set the max. number of images on Photo Touch to 16. Instead of having to keep changing the settings, all you now have to do is to switch between the users which can be done in two clicks.
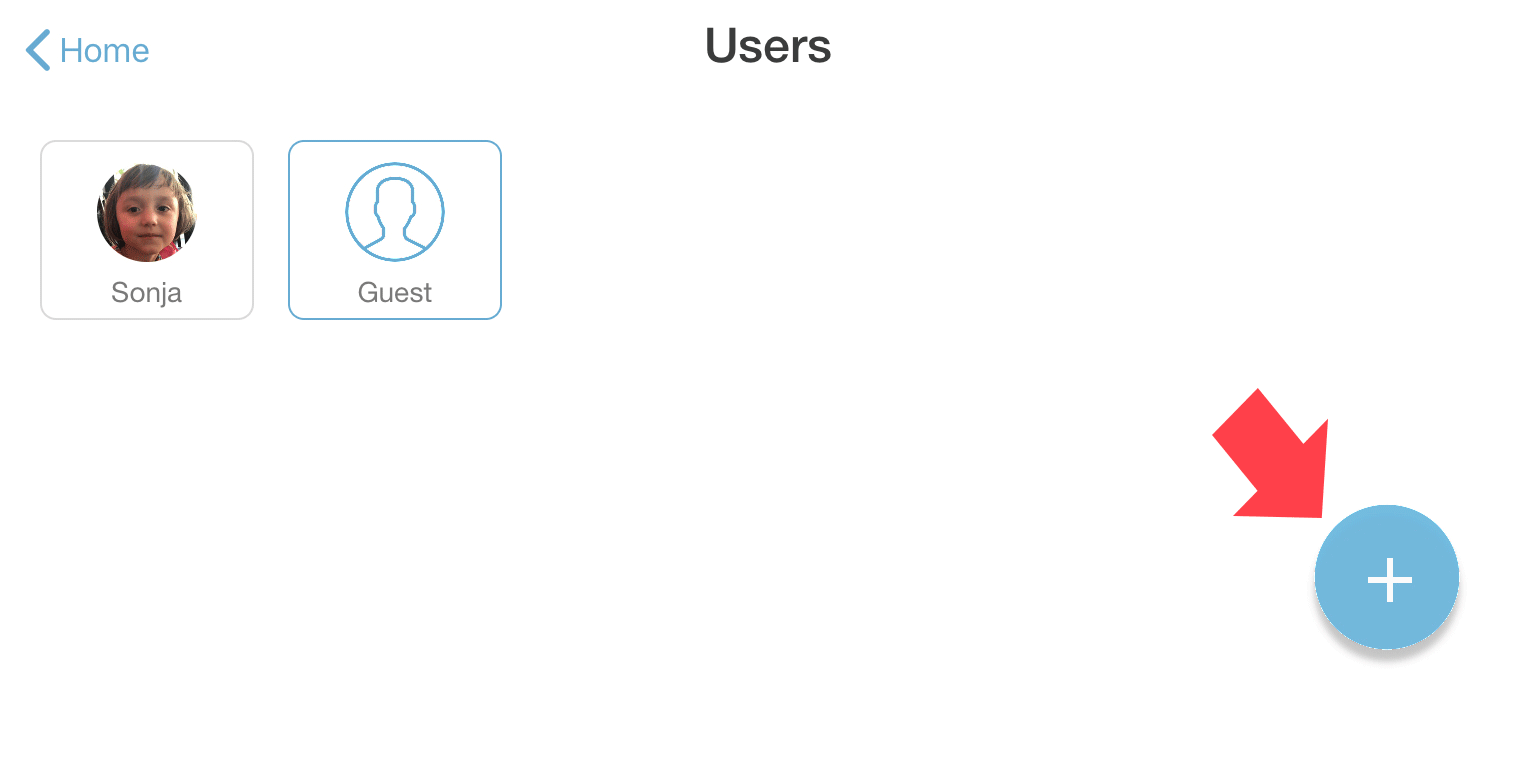
To switch between users, just click on the user thumbnail in the top navigation bar.
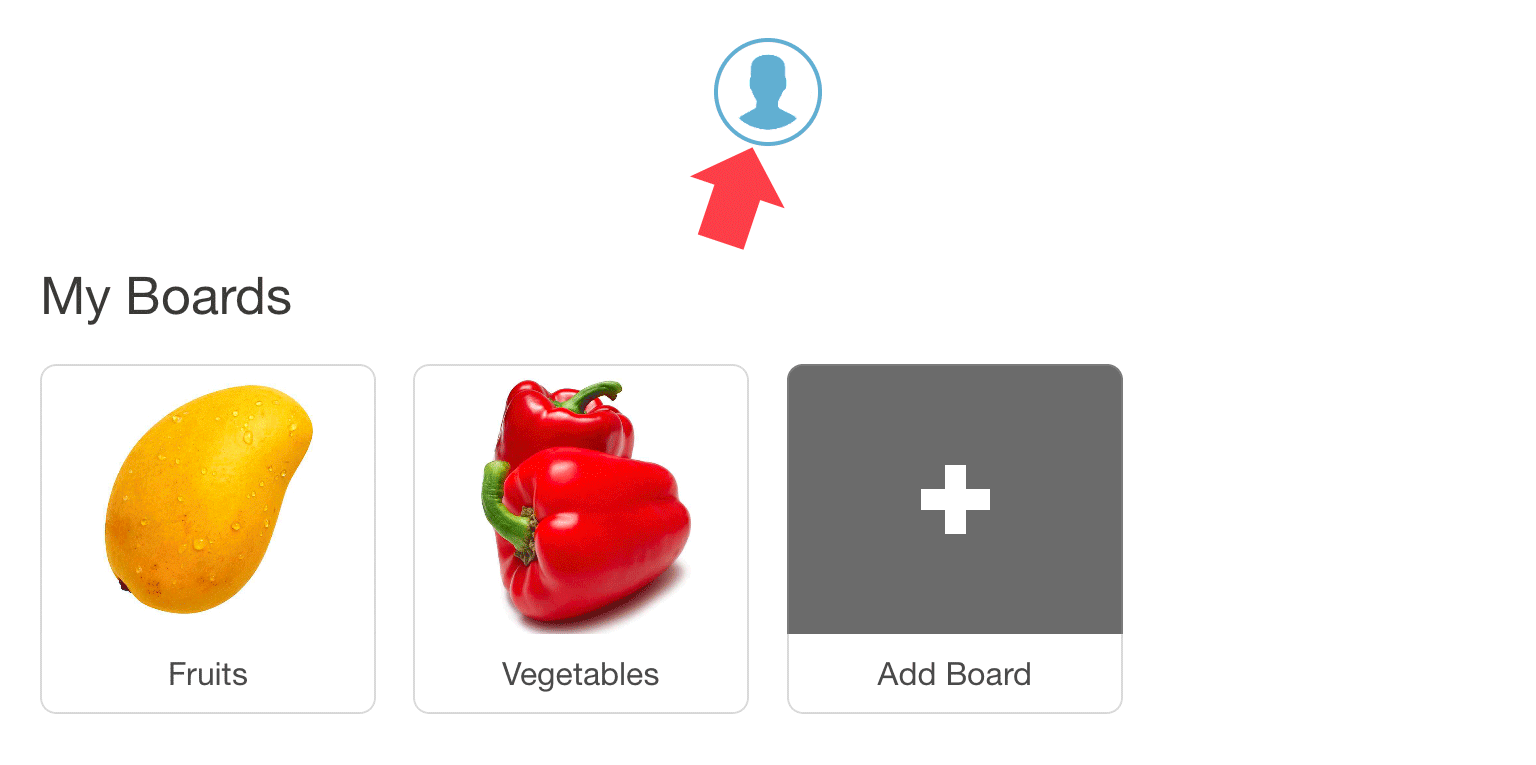
On the main user page, you can either select a user, select the guest account or click on the plus button to add a new user.
You can create local user accounts or register a new user.
A local user account is great for adding your kids or your students because you don't need to add any email or password. However, be sure to link local accounts to a superuser if you want to backup their boards, settings, and user stats. Otherwise there is no way to recover data from a local user account.
A registered user account is ideal if you want to be able to log into Bitsboard on any device and if you want to backup all of your content, boards, and settings. We strongly recommend that you turn “Cloud Sync” on so that all of your custom boards and settings will automatically be saved for you.
Once you have added a user, you can easily customize the entire app for the user by tapping on the user on the main screen and then select “User Settings.” You can also access the User Settings by going to the main Settings screen and then pressing on “Account.”

Under the “CUSTOMIZE MAIN SCREEN” section you can customize the main screen for each user.
My Classes Only: Turn this feature ON if you want to have a streamlined main screen and only display the users’s classes (and none of the users boards). In other words, when this setting is turned on, then the user has to first press on a class and then pick a board from one of their classes.
Featured Classes: Turn this feature OFF to remove all featured classes from the users main screen.
Featured Boards: Turn this feature OFF to remove all featured boards from the user’s main screen.
Show “Add Boards” on Main Screen: Turn this feature OFF if you want to prevent the user from creating their own boards from the main screen.
Display Study Options on Game Launcher: In the game launcher, we display options such as “Study All”, “Study Wrong” and “Study Favorites.” This is great for some users to quickly focus on key items to study but for other users this is too busy so you can remove this option at the user level.
Web Search: This is a very important setting. While creating new bits, Bitsboard shows suggested images from both our own image library as well as from Google Image Search. We have no control over Google’s image search and at times inappropriate images might appear. If you want to prevent inappropriate images from appearing by accident, it is best to turn Web Search OFF.
TO BE CONTINUED